Measuring building air tightness with Pulse

Extensive research into air permeability measurement

Developed in conjunction with the University of Nottingham. Pulse is a low-pressure air leakage measurement technology that is the result of years of research.

Process for carrying out an air tightness test using Pulse

A Pulse test in a residential property typically takes under 15 minutes to perform, with results presented immediately on-screen.

  1. Arrive on site with the Pulse equipment

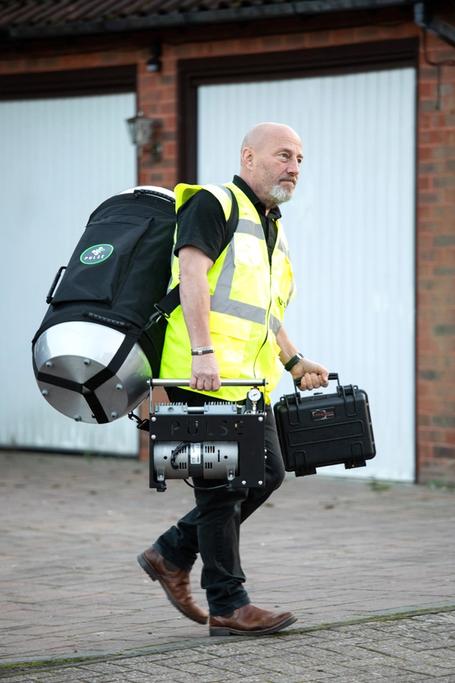
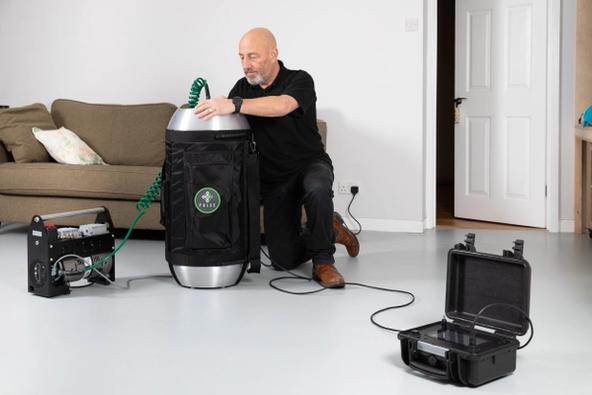
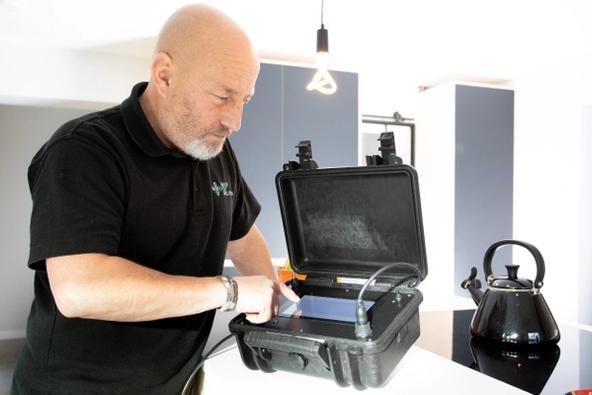
    A single Pulse air receiver, compressor and control unit is designed to be carried by one person enabling easy access to the site.

    Air receivers feature carry handles as well as shoulder straps and have side pockets where all the necessary cables and hoses are stored neatly between jobs.

    Person carrying Pulse equipment
    Person arriving at house with Pulse equipment
  2. Setup the Pulse equipment and charge the air receiver

    The Pulse air receiver is located centrally on the ground floor of the building being tested.

    The compressor is used to fill the air receiver with compressed air up to a maximum pressure of 10 Bar (145 psi). This is enough capacity to test modern new-build properties, but older leaky houses may require multiple air receivers to be used.

    Additional air receivers are daisy-chained to pressurise large or older buildings sufficiently to measure airtightness at 4Pa.

    Person setting up Pulse equipment in a room
  3. Work out the volume and envelope area

    Whilst the air receiver is being charged, there is plenty of time to work out the volume and envelope area of the building which are mandatory inputs for a result to be calculated.

    The building volume is used to calculate an air leakage rate (Q) in m3/h, whilst the envelope area determines the air permeability (AP) in m3/m2.h quantifying the air leakage rate per hour through the entire surface area of the building.

    Floor plan, pen and laser disto
  4. Launch a Pulse test

    A Pulse test is initiated using the touch-screen control unit. This will release one or more "pulses" of air into the internal space of the building creating a pressure difference between inside and outside.

    Compressed air will be released to pressurise the building to 4Pa. As the increased pressure finds all the air leakage paths and returns to normal, readings will be taken using sensitive pressure measurement sensors. Measuring the airflow from the air receiver along with internal pressure allows us to accurately determine the airflow rate across the boundary.

    Illustrations of Pulse in action
  5. View results on control unit

    Results of air leakage rate (Q), air changes (N), air permeability (AP) and effective leakage area (ELA) are presented immediately on-screen at 4Pa.

    Results can be saved, downloaded to a USB stick and uploaded to our cloud-based system for further analysis and reporting.

    Extrapolation of results to 50Pa provides a direct comparison to traditional values people may be familiar with from working with blower door fans.

    Person using a Pulse controller
  6. Generate an air permeability test report

    Once a test file has been uploaded to our cloud-based system, it is possible to generate a detailed air permeability test report.

    The report includes all information about the test and the property it was performed on. This report can be viewed online, printed to PDF or emailed directly to clients.

    Pulse website for generating air permeability test reports

Header